If you’d rather read the PDF version, download it for FREE now!

1. Shoot during golden hour
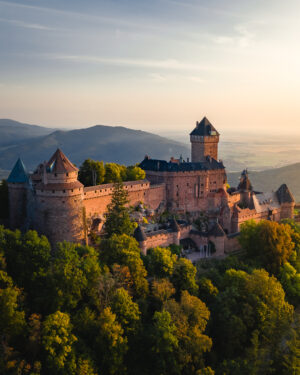
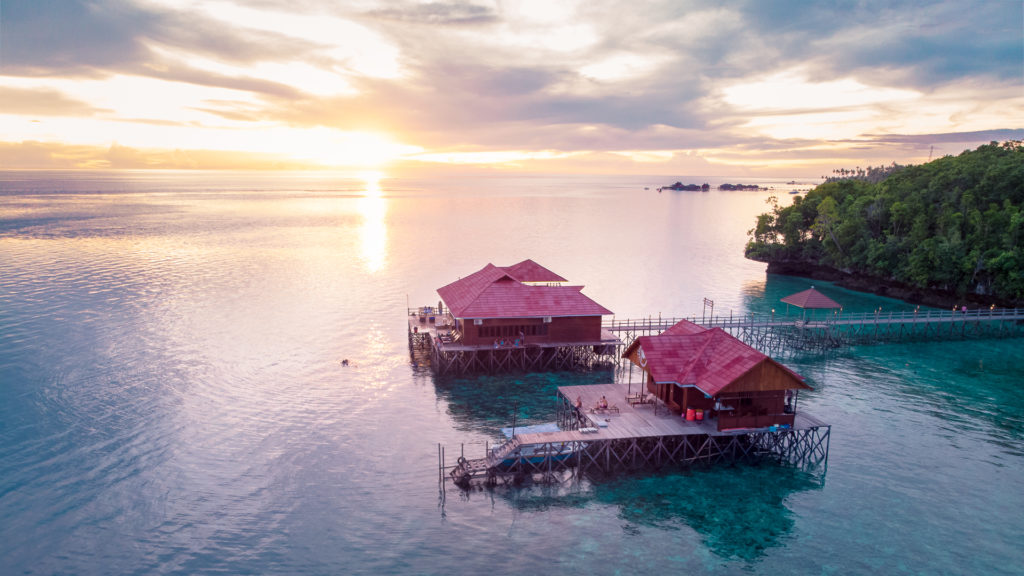
This is probably the most important tip I can give you. Shooting in golden hour will transform your dull looking photo into a magical play of light. The deep shadows and soft light will be very pleasing on the eye. Just try it out and see the difference for yourself ?
Golden hour takes place in the first and last hour of sunshine. So this will depend on your location. You can use an app like PolarPro to tell you when, or just look at your local weather app to see when the sun rises and sets ?
If you can’t shoot during golden hour, that’s OK. Basically the further you’re away from mid-day, the better. Just avoid shooting at mid-day, because that’s where you’ll get the dull harsh light.
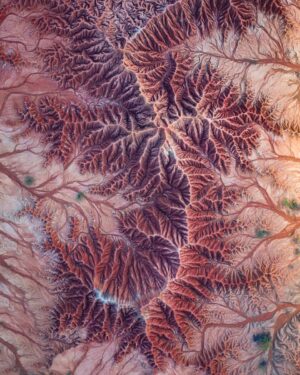
2. Don’t restrict yourself to topdowns
Drone photography is so much more than topdowns. Of course, the topdown is part of your array. But please explore any other angle as well.
The advantage of the drone is not that it can get very high. In fact, as a rule of thumb, the higher you fly, the more boring, dull, abstract your shot will be.
No, the advantage of a drone is that it can fly anywhere. Anywhere you cannot go. Meaning if you’re on the edge of a cliff, your drone can get even more to the left to take that awesome beach shot. Or it can fly over the fence to get the best possible angle on your subject. Or it can fly over the river to make that cool action shot of you on your bike!
Don’t get me wrong, I’m not saying topdowns are off limits. So if you do want to take one, search for nice looking patterns (e.g. lines of crop fields), leading lines (e.g. a road in the forest) or symmetry (for some reason the human brain loves symmetry).
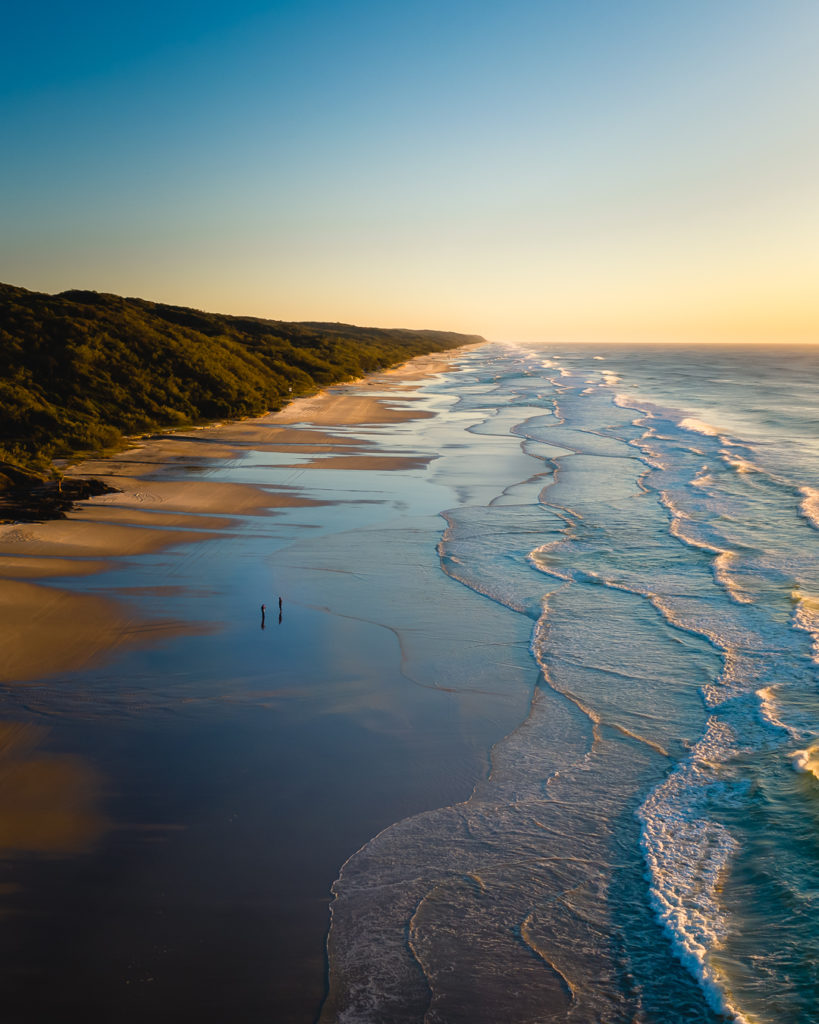
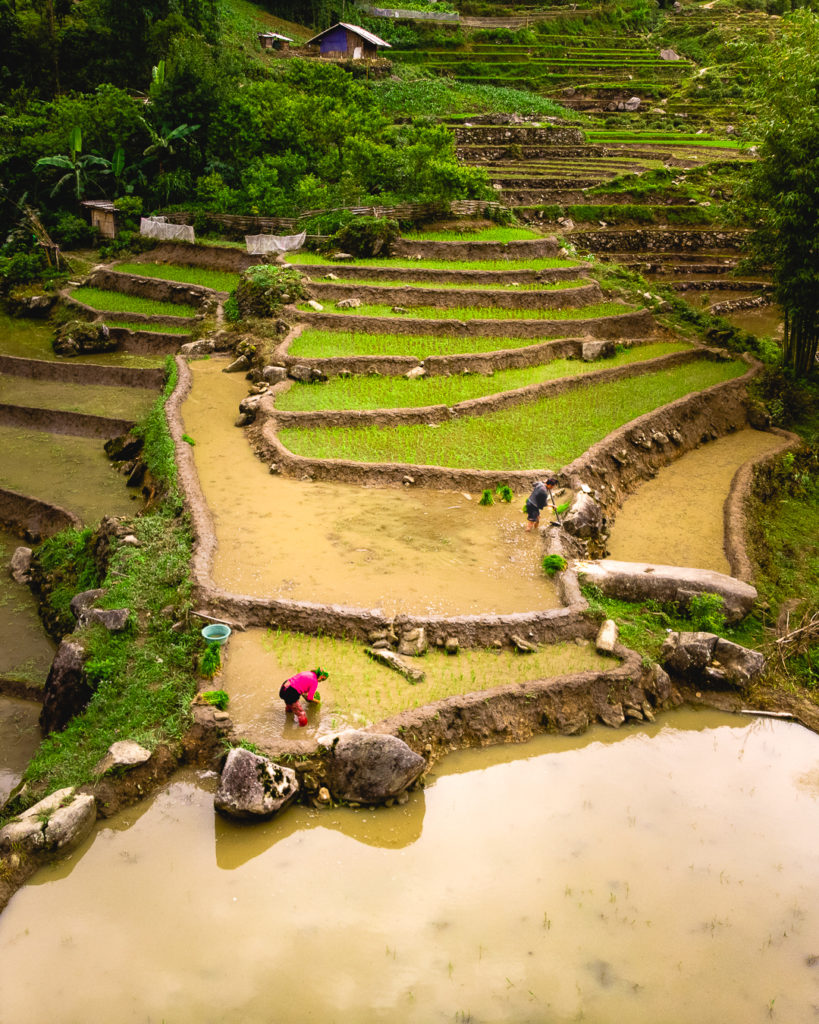
3. Find or add a (human) subject
A beautiful landscape can be cool, but without a subject the eye gets lost and the photo loses meaning and emotional attachment.
So look for a prominent element, like a big tree, a house, a wandering farmer with his buffalo … really anything you can use to draw the eye in and make your shot stand out from any other. Also try to get that subject in the foreground. And if you don’t have a subject, add one!
A human person is the perfect subject in most cases. So don’t be shy and put yourself out there. You can be small, casting a big shadow on the beach. I promise you it will make a huge difference in the overall composition and the emotional connection your viewers will feel with your photo.
4. Apply the rule of thirds
Another major guideline to help balance the composition in your shots, is the rule of thirds. It basically states that if you put your subject or leading line on one of the third-lines instead of in the middle, your composition will look a lot more balanced and your brain will find it more appealing. It’s a bit counter-intuitive in the beginning – people have the tendency to put their subject right in the middle – but it does work. Try it for yourself 🙂
If you don’t know what the rule of thirds is, go check out this video. It’s super important!
Here’s an example where I put my subject on the bottom third-line. The image looks very balanced and your attention will be focused on my subject first and then wander along the coastline to discover the background. If I would have put my subject in the middle, it just wouldn’t look as nice and your eyes would stay focused on the subject.
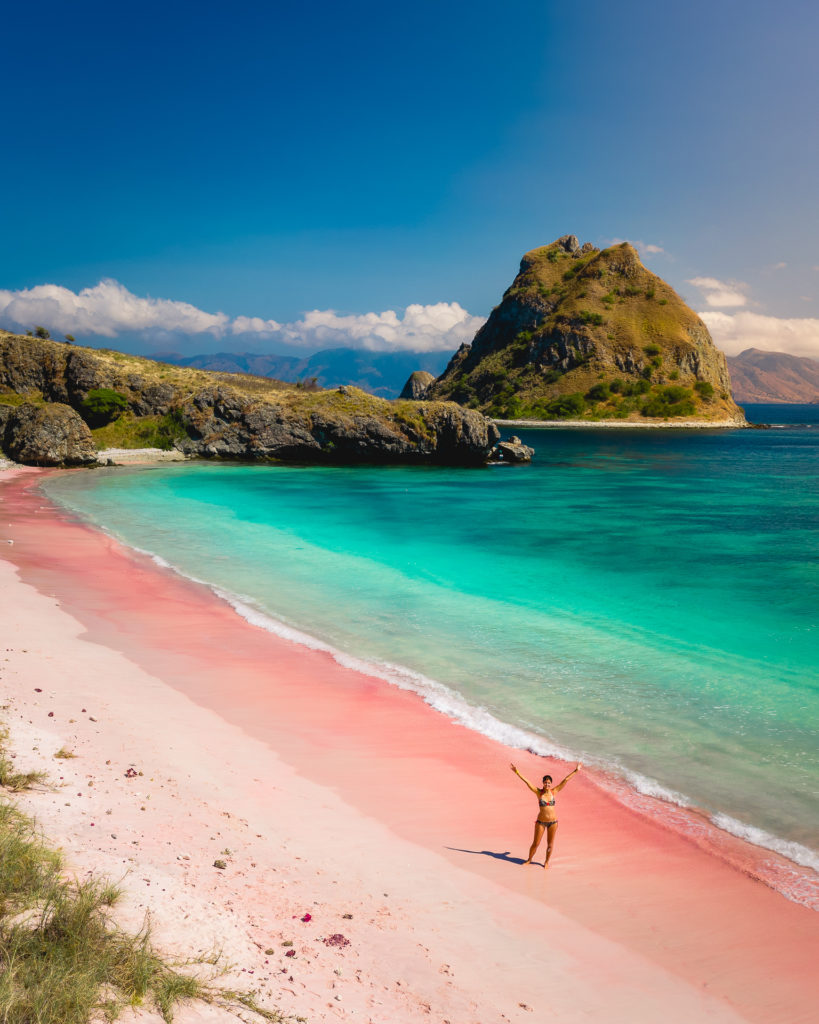
A handy tool to keep this in mind while flying, are the on-screen grid lines. You can activate them through the DJI Go app and it will show the third-lines on your live screen. This makes it very easy to position your subject where you want it to be!
PS: of course you can make exceptions to this rule, for example if you use symmetry. In this case your subject will be perfectly in the middle and not on those third-lines.

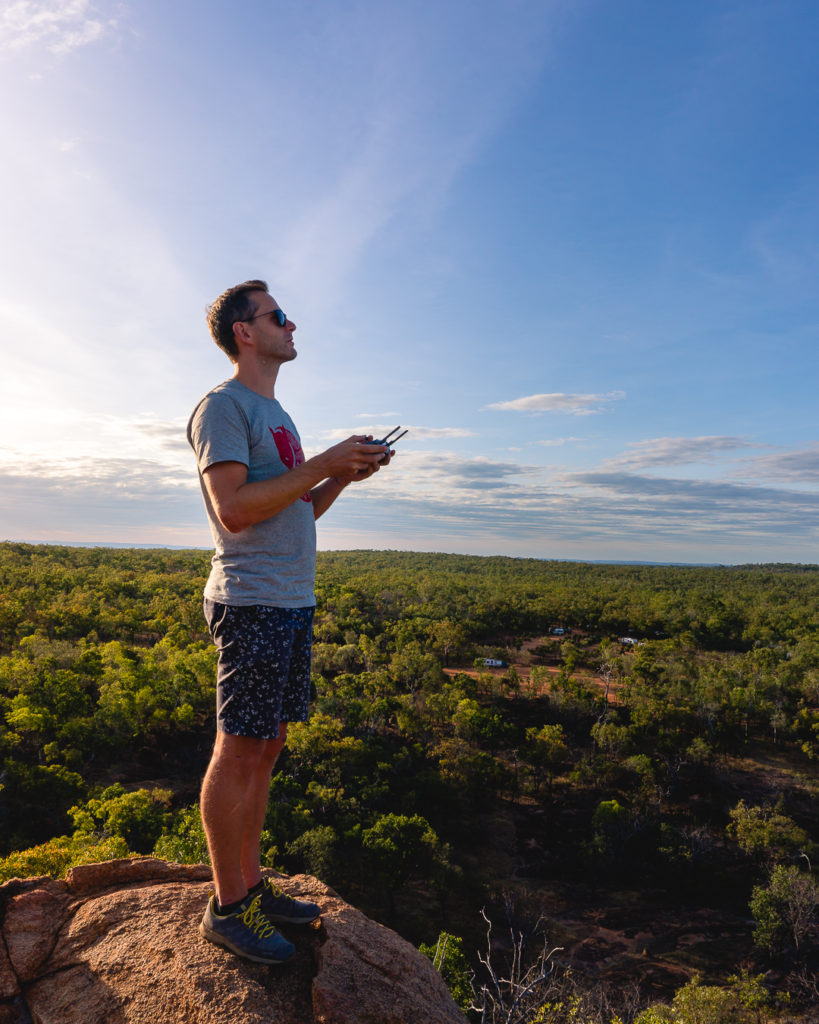
5. Visualize before you fly
All of the above is a lot to process and think about when you’re up flying and 100% focused on not losing your drone. Especially with a drone battery life of 20-30mins, every second up there counts!
That’s why preparation is everything. Before you launch the drone, look around. What kind of environment are you in? Do you need to watch out for power lines, trees or strong wind? What type of shots would you like to take? At what altitude do you need to fly to get them? The drone is slowest moving down, so take all your high shots in 1 go, then come down and continue with the lower shots.
Do you want to film as well? I personally find it most efficient to film while I’m moving from one photo to another photo.
And in case you have a human subject, where does he/you need to be to get that perfect composition. Do you launch the drone from your current location or from the subjects location? My tip: use Google Earth to find good drone spots.
Don’t worry though, in the beginning you’ll be flying around a bit ad random to see what works. And you’ll get maybe 1 good shot out of your first battery. Once you get more experienced, you’ll know right away which composition is going to work, so you can fly around a lot more efficiently and get at least 5 really good photos out of your battery.
6. Use bracketing (AEB) for more dynamic range
Now we’re getting a bit more technical. But I use this one ALL THE TIME. Every single photo in my portfolio has been taken with AEB. It sounds complicated, but it’s really not.
AEB stands for Automated Exposure Bracketing and it means that you’ll take several photos at the same time, with different exposures. I always use the 5x option (you can also do 3x), which means the drone will automatically take 5 photos every time you hit the clicker. Photo 1 will be normally exposed, the other 4 will be -1 and -2 exposed and +1 and +2 exposed.

The whole point of this method, is to merge them in post production into a HDR photo. So once you open up all 5 photos in Lightroom, you can select them all and right-click to merge as HDR. This will allow you to have a bigger dynamic range. This means you’ll have more details in your really dark shadows (info comes from an overexposed version) and you’ll get more details in your bright highlights, usually the sky (info comes from an underexposed version). If you don’t use AEB, you won’t be able to recover as much from the bright clouds in your sky for example.
I don’t recommend the DJI Go built-in HDR photo option btw, because this one does not allow the RAW image format (see tip nr 9). Always do it yourself.
7. Activate the histogram
In order to get a properly exposed photo, you can activate the histogram on your DJI Go app (click the little cogwheel in your photo settings menu to open up the advanced settings). A small box will appear with a sort of ‘little mountain’ in it, just put it in the left corner. And now when you toggle with the ISO, aperture and shutter speed, you’ll be able to judge through the histogram if your photo is properly exposed or not. In general you need to avoid the ‘little mountain’ from going outside of the box and the more you can get it to move towards the right, the better. It means you’ll capture more of the highlights.
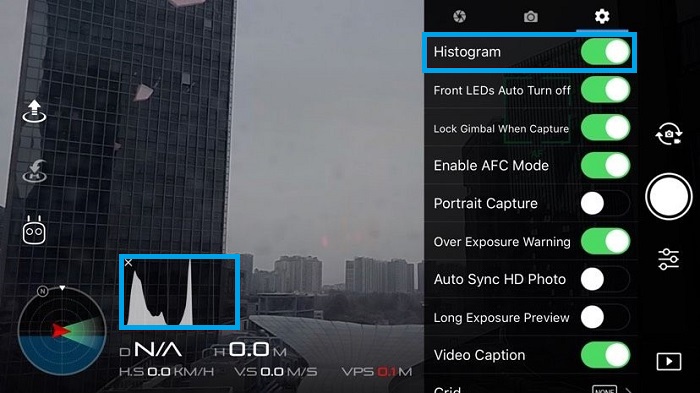
Another handy feature you can activate on your DJI Go app – while you are in the menu anyway – is the overexposed option. It will show a white-black striped pattern in the areas that are blown out. You’ll want to avoid these lines from showing up too much. Because as a general rule of thumb, any highlights that have been blown out, cannot be recovered in post, because they are just pure white and contain no details.
Luckily you’ve already applied the AEB bracketing option. So you’ll have some underexposed versions to recover those blown out highlights from. But of course, it’s always best to start from the best possible exposure!
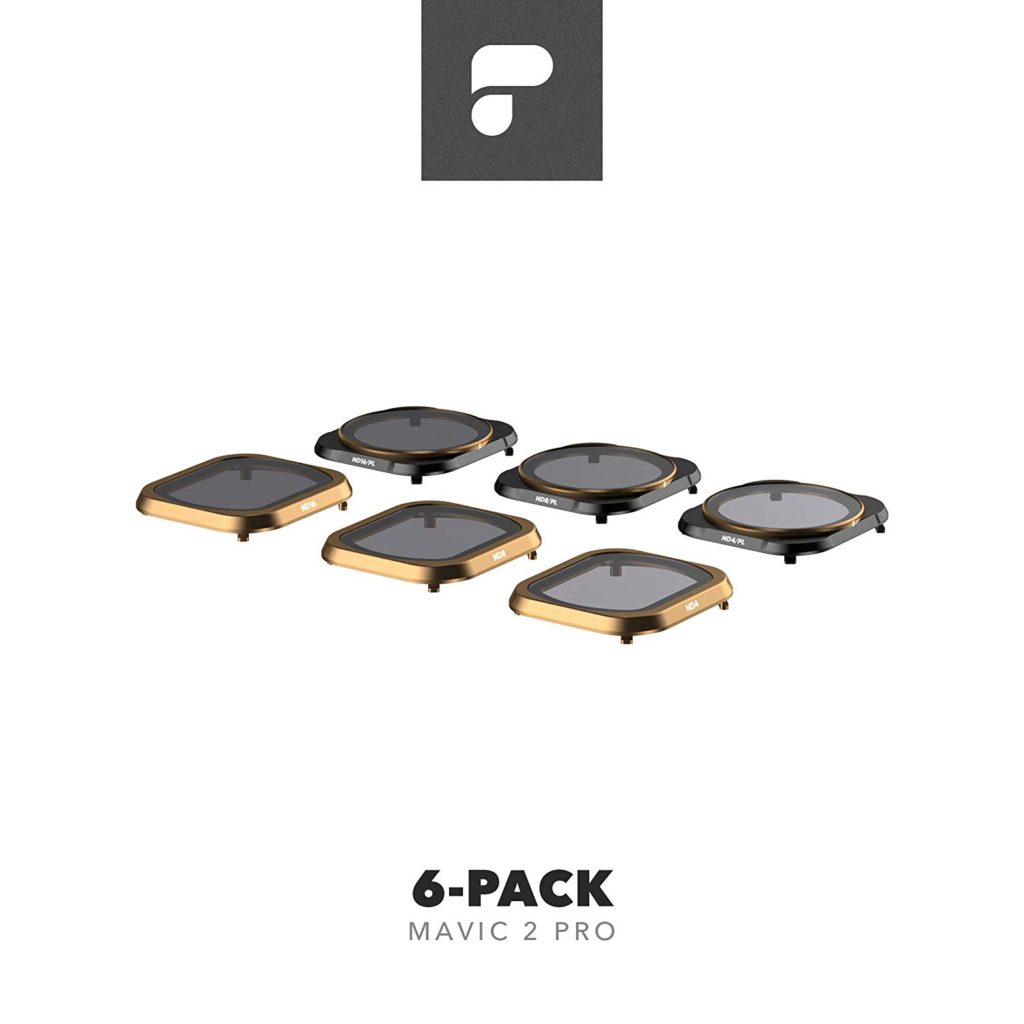
8. Use polarized ND filters
The ND filter is like sunglasses for your drone. When there is too much sunlight (like ALWAYS during the day), it will filter some of that light out, so you can expose the shot the way you want it. Especially when you film, you want to keep a shutter speed of 1/60 or 1/50 (double your frame rate). This will not be possible without any ND filters.
You could still get away with photography without any ND filters. It would then use a super fast shutter speed for example. But in general: just get some ND filters, it will make your life so much easier.
And when you do, get the polarized versions of the ND filters. It took me 9 months to figure this one out (I wanted to save a bit of money in the beginning), but now I basically only use the polarized versions. The regular ND filters have not yet left the box!
The advantage of the polarized filters lies in its ability to filter out reflected sunlight. This is especially handy when you are shooting near water or have a lot of sky. Normally you always see an ugly white spot on the water = reflected sunlight. With the polarized filters you can reduce this to a minimum. On top of that it also helps to pop the color on anything else in your photo. Your blue sky will actually look blue! So my recommendation would be to always use them.
Don’t forget to turn the polarized filter in the best angle every time before you fly, to get the best effect.
9. Shoot in RAW
The RAW image format might be a bit scary in the beginning, but it will help you to get more dynamic range in your photos. The standard built-in jpeg format is great for previewing your images, as it will have the right colors. But a jpeg is a compressed format (usually around 8Mb vs 40Mb in RAW), so that means you already lose image quality even before you get started.
If you open the RAW on your computer to preview, it will look ugly and the colors will look flat and greyish. Don’t worry about that, this just means you have more detail in your photo 😀
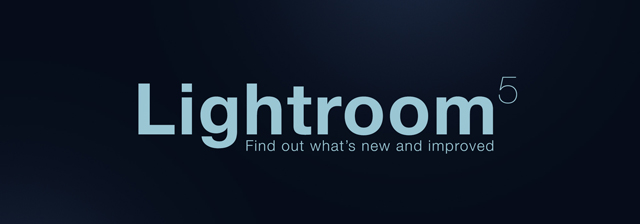
10. Edit to perfection in Lightroom
Open up the RAW image format in Lightroom and start to edit. You’ll see it come to life.
I tend to start with the ‘auto’ button in the general settings. Lightroom usually does a pretty good job. And then you can start with the other sliders to edit the photo in your personal style.
I did a whole blog post on my Lightroom workflow. So check it out if you want to read more on the post processing editing.
The latest Lightroom version is available as a subscription, so you will always have the latest update etc …
Last but not least: Export your photo as a jpeg and you’re all done. You have just created a magical aerial photo that was taken in the right lighting conditions, that was perfectly balanced in its composition with a subject in the foreground and still has all the details in the shadows and highlights. Congratulations! 🙂 This is what they call a BANGER!
Do you want to take your drone skills to new heights? Do you want to learn how to take those amazing drone photos and cinematic videos? Check out my brand new Drone Adventurer Masterclass!